Recurring Sales Journal: Navison
Master Data
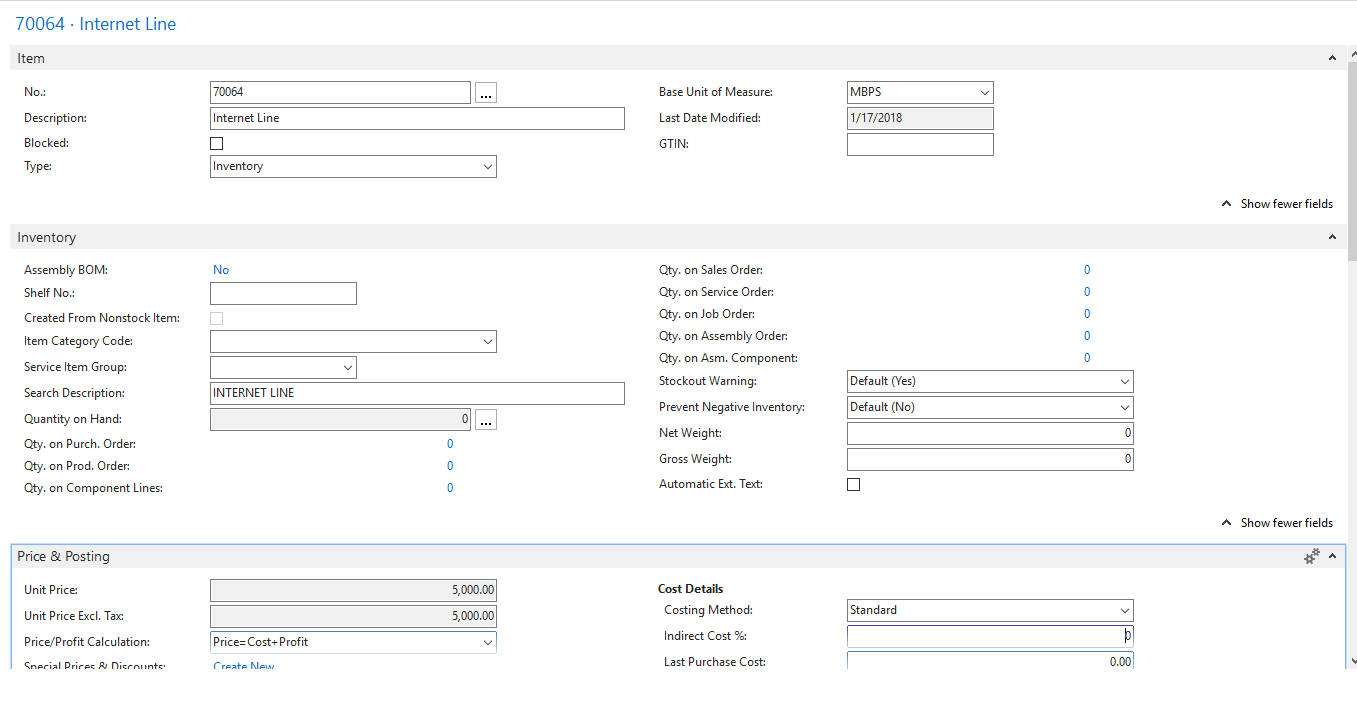
Item Card
For demo, we will create one item named as ‘Internet Line’.
Customer Card
Then for the demo, we will create 3 customers.

- PRAN RFL

- Brac Bank Ltd

- ABC Software Ltd

Recurring Sales Journal Process
Standard Sales Code
Go to
Financial Management > Receivables > Setup
Or
Sales & Marketing > Order Processing > Setup
Then, select ‘Standard Sales Code’.

Click ‘New’
Fill the lines with this,
Code: ‘INTLINE’
Description: ‘Recurring bill for Internet line’
Currency Code: BDT

In Lines,
Add the ‘Internet Line’ item. We set the ‘Quantity’ field to 10 and ‘Unit of Measure Code’ as ‘MBPS’.
Set Sales code for the customers
Now, we set this sales code for the customers.
Open any customer cad.
Go to
NAVIGATE > Recurring Sales Lines
And fill the lines with necessary information.

Code: ‘INTLINE’
Valid From Date: ‘’ [Starting date of bill]
In the lines, ‘Customer No.’ is for indicating the customer. By adding more than one line, we can select multiple customer.
We can also, set ‘Recurring Sales Lines’ by opening any customer and assign the sales code.
Create Recurring Sales Invoices
Go to
Departments > Financial Management > Receivables

And select ‘Create Recurring Sales Invoices’.
Fill the form with appropriate data.
Here, posting date will be the bill issued date.

Click ‘OK’. Then, 3 invoices will be created.

Sales Invoices
Go to
Departments > Financial Management > Receivables > Sales Invoices

Here, we will get 3 newly created invoices.
If we want to print ‘Draft Invoice’ then open any sales invoice and go to
Actions > Posting > Print Draft Invoice

Click on the ‘Print Draft Invoice’.

Click on the ‘Preview’ or ‘Print’.
The generated invoice will be

Now, post the invoice


Posted Sales Invoices
Go to
Posted Documents > Posted Sales Invoices

We will get the latest posted sales invoice.
To print the invoice, click on the ‘Print’ button.

The generated invoice will be

Summary
From the next recurring months, we will create the invoices from the ‘Create Recurring Sales Invoices’ task.
For the next month ‘March’, we select the posting date as ‘March’ month i.e. next month.

Then, another 3 invoices will be created.
The sales invoices will be

Then, in the similar way we can create the invoices.

Comments
Post a Comment